Wednesday, December 9, 2020

Screen Printed Haori Jacket


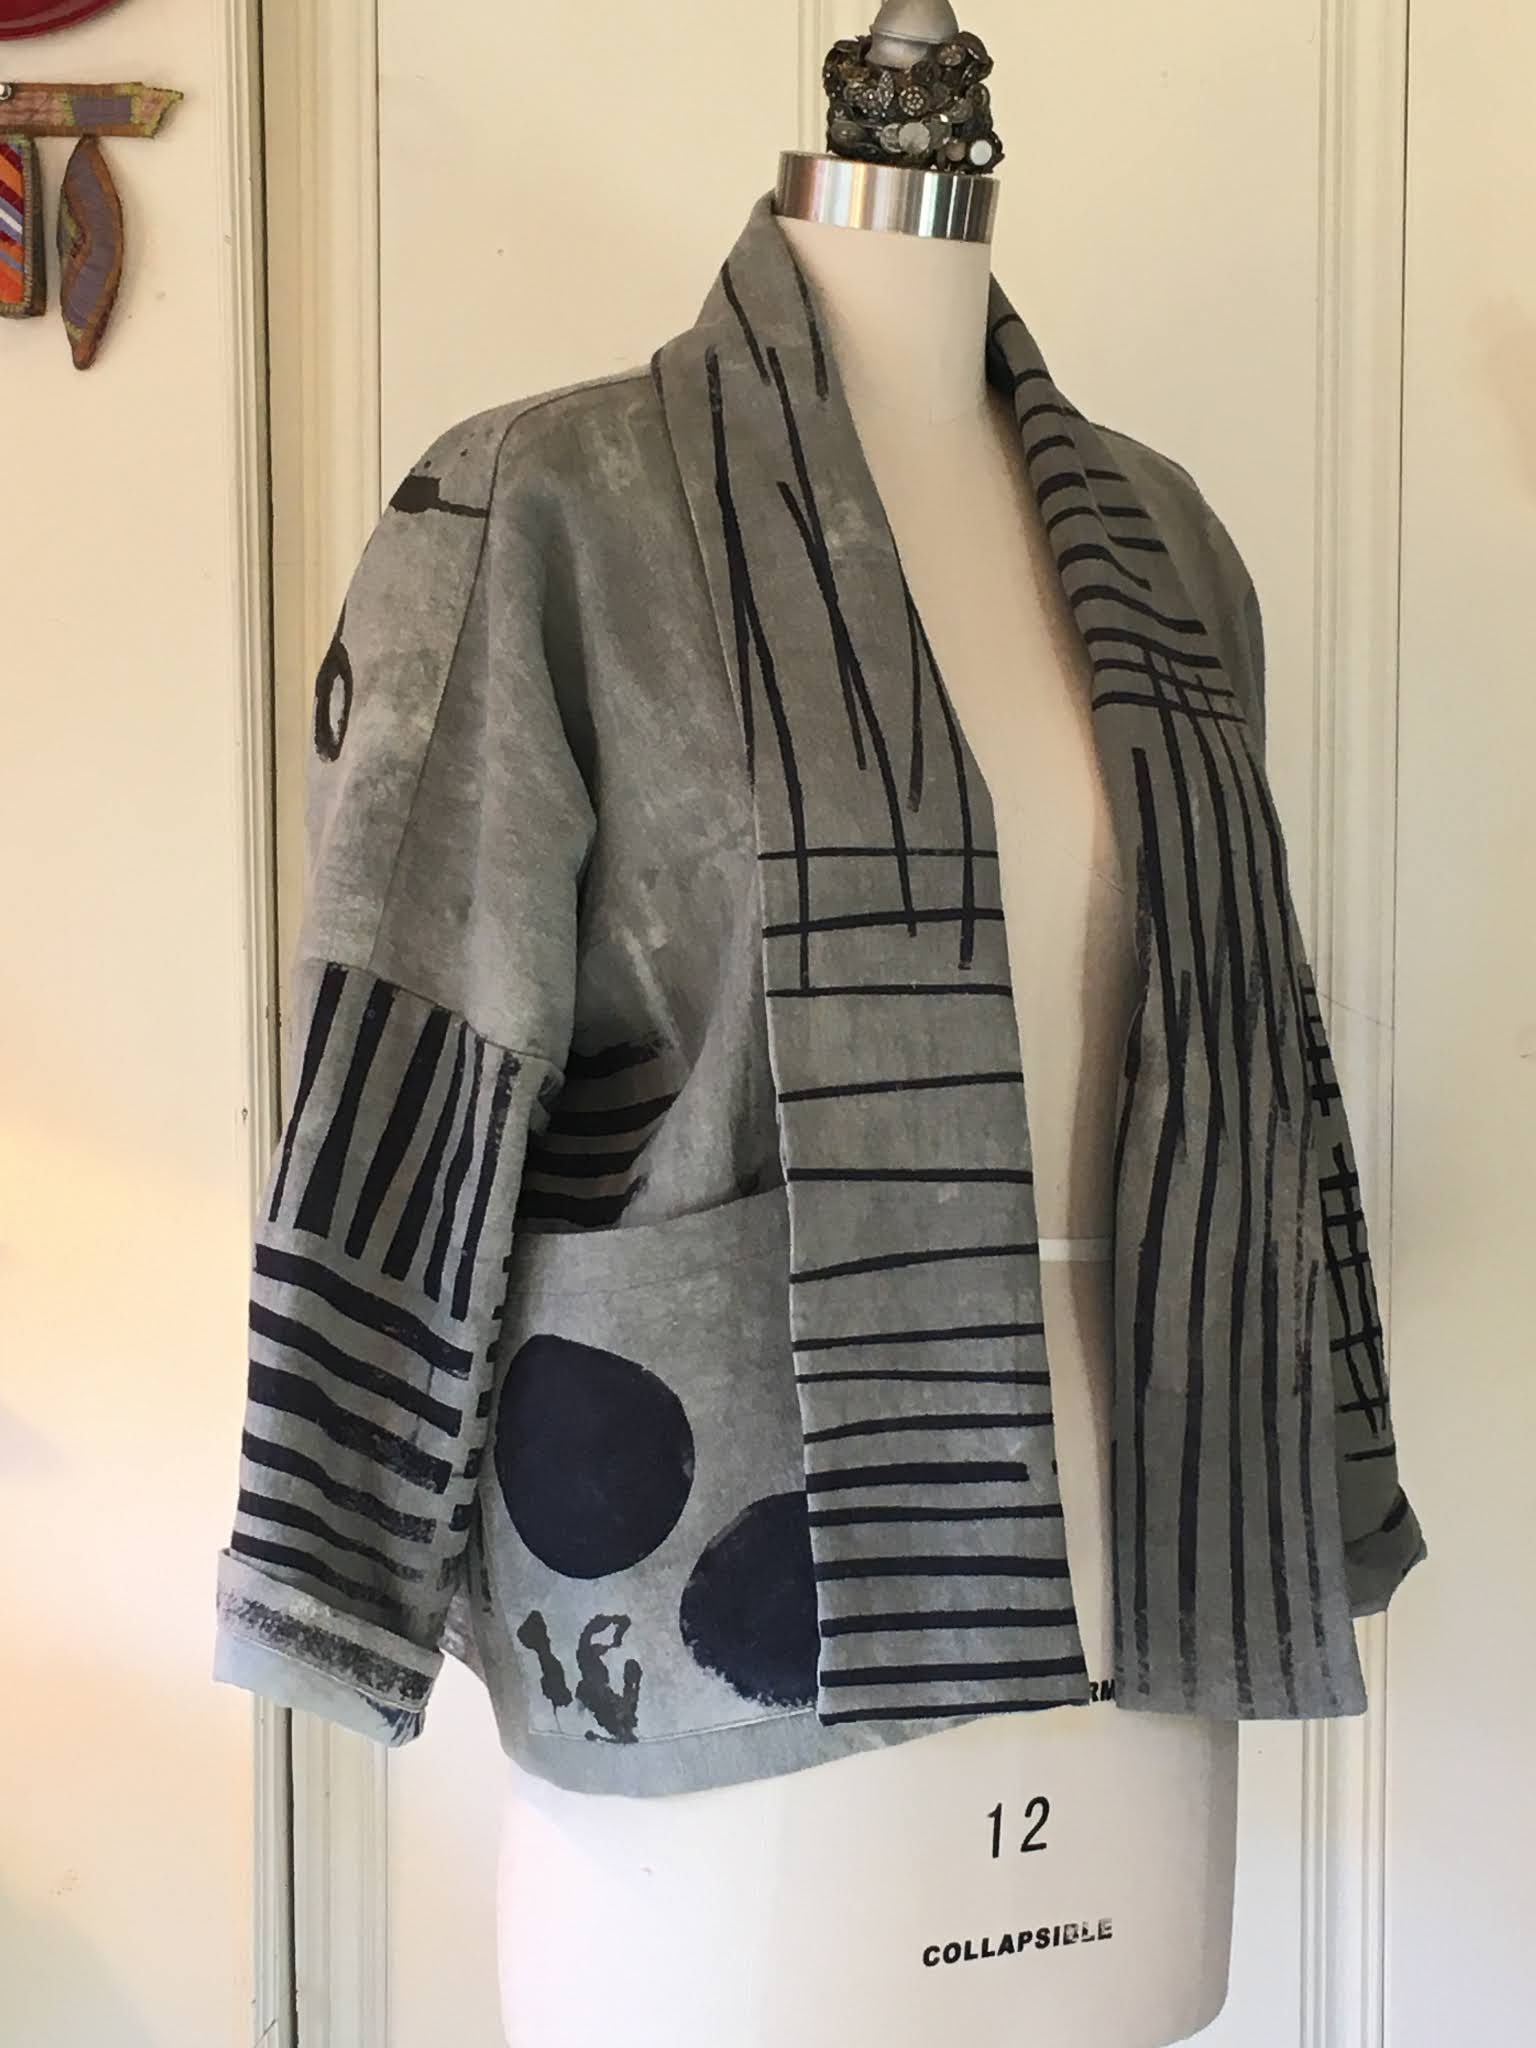
I took another online class, screen printing with thickened dyes from the lovely Pat Pauly. She is offering several such classes online in the coming year.  I recommend them.  They are labor intensive but really fun and very professionally done.

I wanted to try the Wiksten Haori pattern so I purchased a huge painter's drop cloth from OSH (Outdoor Supply Hardware here in California).  It had a lovely hand, loosely woven, it was a runner of about 20'x3' and cost only $18.  I washed it in Synthrapol which made it even softer.  


I traced the pattern pieces with a Sharpie, giving myself some extra room in all directions in case of shrinkage.  Next time, I'll cut it out, it will save space on the worktable.  I serge all of the edges carefully to avoid fraying during wash out.

I scraped grey over the entire piece of cloth in an uneven design...after all, I don't want it to look like I bought a piece of grey cloth to screen onto!  

I used several screens of my own making.  And some hand scribbling with a squirt bottle.


I really like the pattern.  It's extremely roomy tho so be careful.  I cut a medium and I think I could go down to a small on everything but the sleeves next time.


This garment looks and feels like it's been worn by someone at work for a few decades, which I love.  The minute I threw it on it felt like a favorite old garment; soft and comfortable.


For the lining I used a heavy cheesecloth, or really shear muslin, not sure which since I've had it in my stash for years.  I printed it with an old silk screen I created years ago.  The weight works really well next to the drop cloth fabric.

One huge plus about this pattern is that it's almost zero waste, something surface design folks look for.  Who wants to cut away so much of your hand printed fabric?

My next post will be another use of the cloth I made in the class.  This time I'm trying several different pieces in one garment.  Watch out...might want to put on sunglasses before you open the next post...just saying...


Tuesday, November 3, 2020

Block Printing

A few months ago I took a block printing class from Valori Wells of The Stitchin' Post.  It was one of the best classes I've ever taken.  And it was online!  She taught us from her home studio over two sessions.  I got so much out of this class I've joined a small group of women from my area who were in the same class.  We meet every month or so online to share what we've been carving and printing.

Of course, I'm printing mostly on fabric, which is what Valori teaches.  But the same principals can be applied to paper.  I'm slowly building a "block library", trying to make focal point images as well as border images and overall background images.

I'll be posting more about this in the future but here's a start.


You may be asking yourself, "What is a cucumber doing in a block printing post?".  The answer is that I shot this in the summer just when my cucumbers were starting to ripen!

This is printed on an old Eileen Fisher linen sheet that I used to practice.  The main image is Amabie.  An ancient Japanese yokai,;creatures, monsters and fairies from Japanese folklore.  Amabie is said to help protect against epidemics.  I've been printing her lots lately!


I wanted strong graphic prints for borders and backgrounds.


This garment is made using the indigo fabric I made in Japan last year, plus some other pieces I have made since.  It's a very simple, no-waste pattern.  When you put that much time into making the cloth you don't want to cut out much!


Detail of the panel I hand stitched onto the front


You can catch a glimpse of Amabie peaking out from the sleeve on the back view.


Close up of Amabie, a mermaid with three legs and long flowing hair.


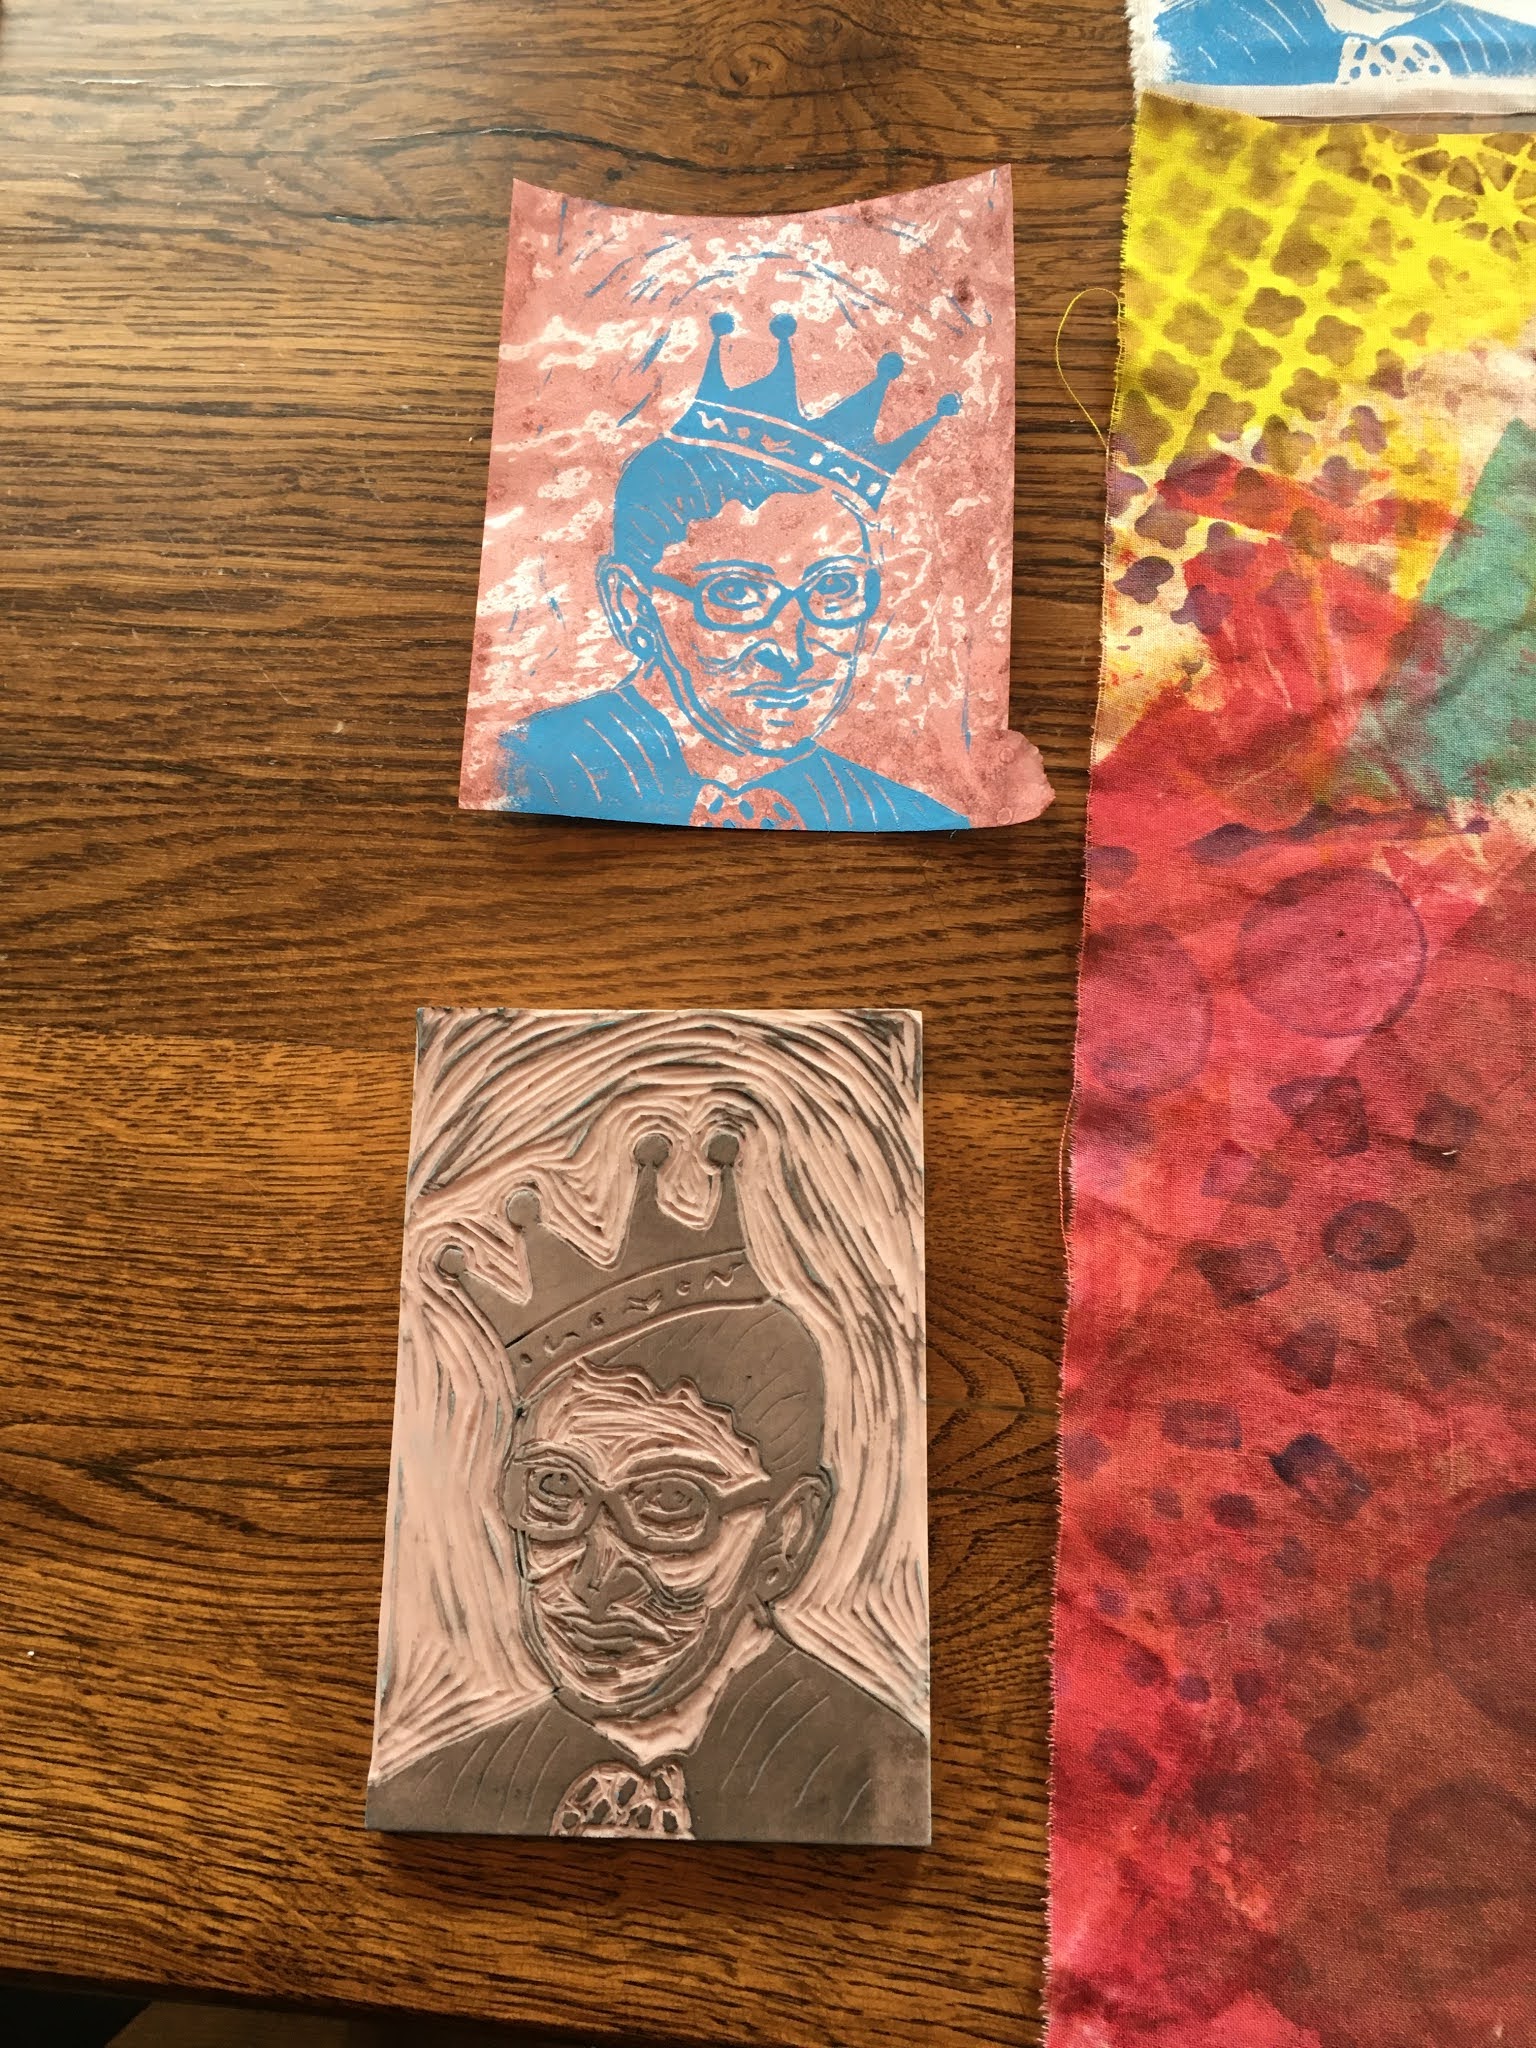
When RBG passed away I felt compelled to do something and this is what emerged.  I've printed dozens of these and given them to friends.


I tried printing on paper for the first time with paper my husband Joe made.


I also tried printing on scraps of cloth I'd previously dyed.  I would use a darker ink next time.


Little RBG pieces of hope.


Then I went wild on the old EF sheet.  I kept practicing and practicing till I had enough cloth to make Linda Lee's Cottage Shirt.  I struggle with the collar on this pattern and this time just omitted it. 


I love this pattern so much.  I'm going to try another collar technique next time.  Her instructions for the collar on this pattern are just too darned hard for me.


Amabie shows up a lot in my work these days.


I continue to carve and print.  Some work better than others, it's the learning curve.  But I'm signed up for more classes with other teachers and will continue to incorporate this technique into my surface design.

It's election day here in the US and I'm trying everything I can to avoid thinking about it.  Next up, Apple Butter, which will keep me over the stove for 4 hours...that should do it!


Saturday, October 24, 2020

Textile Surface Design


I think all of us are asking ourselves, how do I dress and look good wearing a mask?  For some reason some of the more "out there" clothes I have made seem like they'll make me look like a crazy lady while wearing a mask.  Is anyone else thinking that?

I'm working on it, I've been slowly introducing more adventurous outfits lately.

Let's face it,  I have a lot of clothes.  Most of them made by me.  I have more clothes than I could wear in a month....changing twice a day.  Especially during this phase of my life, home most days, enjoying peace and quiet, I dress casually so that I can tear outside and tend the seedlings or go out in the garage and slap some paint on fabric.  So I've been a little less motivated to do my usual sewing.  I've done some, but mostly these days I'm interested in using the fabric I've made.  Creating fabric is getting to be a passion.  

I'm taking several online classes in the next few months and have been acquiring various white fabrics for those projects.

Here are a few of the garments I made from my last few classes.


This fabric was made in the 2nd  Pat Pauly I took in Sept.  It is using two techniques.  One is the stenciling at the top and bottom, which is part of Pat's curriculum, and the large ovals are deconstructed silkscreening I learned in Kerr Grabowski's class two summers ago.


This is a lightweight ponte, mostly cotton, of course there has to be some synthetic in it for the stretch but it holds the dye just fine.


The deconstructed silkscreening gives you results you can't ever control.  That's the fun part of it. As the dye slowly releases from the screen each successive print is different.  I like that a lot.


In my last blog I showed you a photo of fabric hanging to dry after the class.  This is the dress I made from that fabric.  It is a lightweight seersucker type fabric.  The pattern is drafted from RTW.  


Love the huge pocket!!


I'm learning a lot about color with each class.  There's nothing like more hours put into your work to teach you what doesn't work...and what does.


This is another very lightweight ponte.  I made this fabric in Kerr's class last year and just got around to sewing with it.


The black detail on the sleeves is from a silk screen I burned in a Holly Badgley class many years ago.  I'm building a nice library of images to use as layers.


This is a very lightweight cotton knit that didn't hold up well to the rigors of dyeing.  It's pretty stretchy and wrinkles badly.  I color blocked this one, using paper and painter's tape to block out areas. 

 It wasn't a really satisfying technique for me so I won't be doing whole cloth with this style again.  But it was useful to see how it works and can be used here and there.


As I  mentioned above, learning, keep learning...over and over...never stops...about color.  Some of these work, some do not.  I' like to spend some time before the next class (yes, I'm taking another Pat Pauly class!) and do some dye mixing to see what happens.


This tunic pattern is by Katherine Tilton B6564.  I've made it twice and LOVE it.


And this is just a whimsical idea I had.  The tshirt that is on top was from Lucky Brands and was always too small for me.  So I hand stitched it onto a men's shirt.


And I tried sewing the cuffs onto the top of the sleeve.  Not sure I love this, I'll probably take that off.  What do you think?

Next post will be on the block carving and printing I've been doing.  Stay tuned!


Monday, September 7, 2020

Silk Screening with Thickened Dyes

Hi everyone, long time!  I've been doing a lot of surface design, a lot of hand sewing and a bit of machine sewing.  I just finished a class with Pat Pauly.  I took the same class last year at the Pacific NorthWest Art School.  

Pat is a terrific teacher and this class was so fun and successful.  It was a live class!  I've never taken a class where you are in the artist's studio for the whole five days.  And of course that means she was in your studio, too!  There were 8 of us, so the Zoom screen was a perfect 9 Hollywood Squares.  

Pat lives on the east coast so the class started at 8am each day.  Even after it ended I was out in the garage printing.  I worked 8-10 hours each day.

It was fascinating to see how the others set up their studios, and to be able to work alongside Pat in her studio was really great.  I recommend this class for anyone who is serious about silk screening with thickened dyes.  There are a lot of materials needed and its fairly rigorous physically.  But if you are inclined to try it I would say go for it!

After working with this medium for a year I think I'm getting to the place where I can create enough fabric to make garments.  I'm still working on the images, figuring out what I'd like to paint, but I'm closer than I was last summer.


The first piece of fabric I worked with was a combination of 4 women's light grey tshirts.  I cut them up first so that I could lay them flat before printing.  This garment is either very chic or looks like I've escaped from King Arthur's Court...and am still walking around in the same garment!

I used a self drafted pattern from a RTW garment.  I've made this pattern several times.  It's a perfect shape to piece fabrics together.  


I'm crazy about this pattern.  It's way more flattering on than it looks in these photos.  It has a very flattering drapes over the body.


The process uses a combination of techniques; silk screening, direct application and painting to name a few.


Pat is a very generous teacher and super easy to follow.  She give a huge amount of techniques and gives you time to explore each one during the week.


I had a lot of fun piecing this.  I got nervous after I did the front, thinking I might not have enough but had some leftover.


 I'll most likely use the same pattern for this 3' length of seersucker.  I might do a bit more doodling with my new Arteza Fabric Markers.


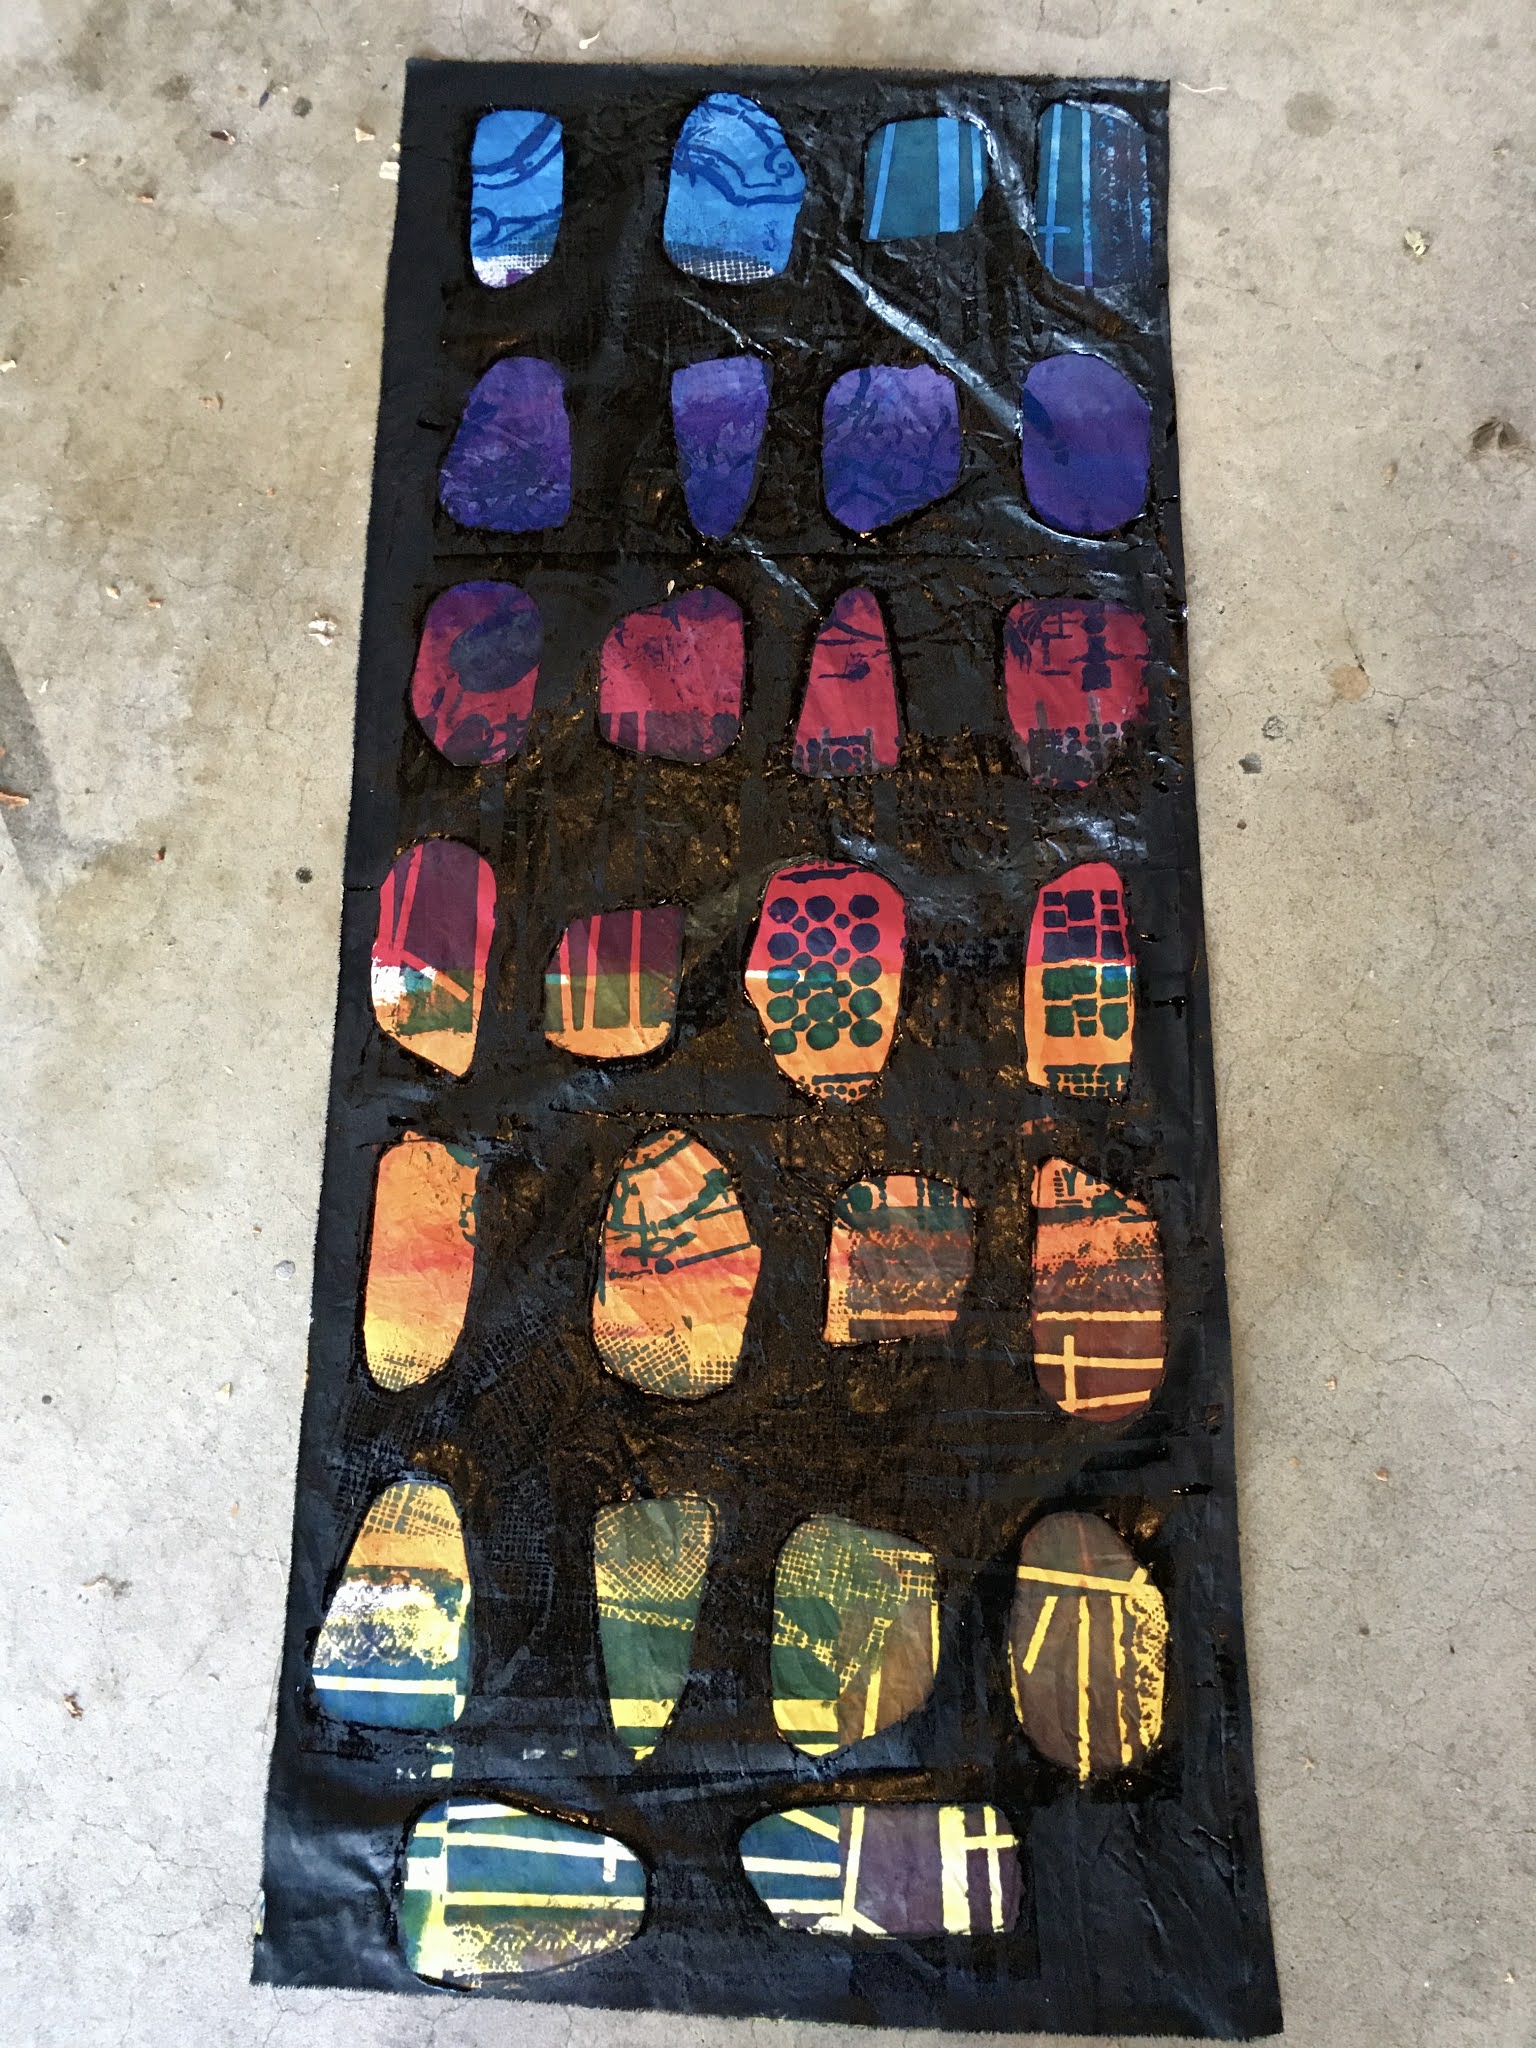
Here's one of the techniques I'm developing.  It has three layers of color applied, waiting for the last layer to dry before applying the next.  This photo was taken before washing, that's why it looks a bit shiny.


This knit was painted.  Not sure I'll do this technique again, it's not as satisfying.  But I have three yards of it so I'll make it up and see how it looks.  Not sure what it will be yet...

Until next time...


Wednesday, May 20, 2020

Love Birds!


Most everyone who knows me knows that I love birds.  Joe says it's because I have a bird beak for a nose.  I'll take that.  I do!

Often, when I don't know what I feel like sewing my hands go to bird making.  You can see several Ann Wood birds that I've made in the Misc. page on this blog.  

I make other types of birds, too.  One that I've been fooling with for a few years now is a bird broach.  I've gathered a little flock.


Here they are, all flocked together on the railing of bunkhouse deck, enjoying this ancient red rose in all her glory.  We inherited this rose, I know not the name.

My little broaches, well, they're not so little, are really satisfying to make.  I pull out the bin full of hundreds of fabric scraps and start painting with cloth.


 They are very rough, I don't like to work in an exacting way, nor am I able to so that works out.  I use pearl cotton, embroidery thread and regular sewing thread.  The base is cardboard.  I tape wire to the legs for stability.


These little guys are a joy to make because each piece of cloth is a reminder of a project I worked on. The cloth could be old silk scarves, cashmere, vintage kimono fabric, pieces of garments I made or remade from RTW.


I glue a piece of cashmere onto the back, cut it just a smidge bigger than the cardboard.  I attach a pin back to the cashmere before glueing.
Then I sew the small pieces that make up the bird to that along the edges.  I finish with the stitching.


And I make a big, glorious mess doing it!
Tweet!

Here is a post from Colossal, a wonderful online newsletter that I subscribe to, showing  latte birds.  So delightful.


Sunday, April 19, 2020

When The Going Gets Tough, The Tough Get Sewing

How can I feel so good about all this time to sew and make?  Shouldn't I be feeling anxious, worried and stressed?  Am I the heartless person who blithely goes about her life not caring about others?

These are the questions I've been asking myself lately.  I am comfortable with this new life.  Staying home, wandering around the house and garden, cleaning...tidying...disinfecting(!)...making things work again that have been broken for years.  More time to consider, notice and just be.

There is something about this time that is very calming and satisfying.  Maybe it's my age?  Maybe it's where I am in my life?  Whatever, I feel lucky to be in the position I'm in.

Of course I am horrified by the tragedy we are witnessing and I am mindful of how fortunate I am.  My major worry and heartache is that our business is closed and we have had to lay off dozens of people which was the hardest thing I've ever done in my life.  We are trying hard to work with each of them to help in some way.

But I find some comfort in knowing we are not alone in this.  It is what's happening and there's little that can be done right now.  We just have to wait and see when we can open again and bring back as many of our wonderful staff as we possibly can.  It will take a long time but we will do it!  And for the meantime, I intend to use this time for reflection and self improvement.

So, I'm sewing like a fiend!  And making stuff.  Making masks for my colleagues and friends.  I find that sewing clothes does not have the same appeal it did before the SIP order.  I can't wear any of them!  And the clothes I find myself wearing are the old ones that I can throw in the washer after one wearing and set it to HOT...which I never do normally.

I'm in the bunkhouse pretty much every day.  Some days I just tidy up, and I mean some deep cleaning that's been needed.  I've been mending and remaking; the projects that always got sidelined because of lack of time.

So here goes, this is what I've been doing.


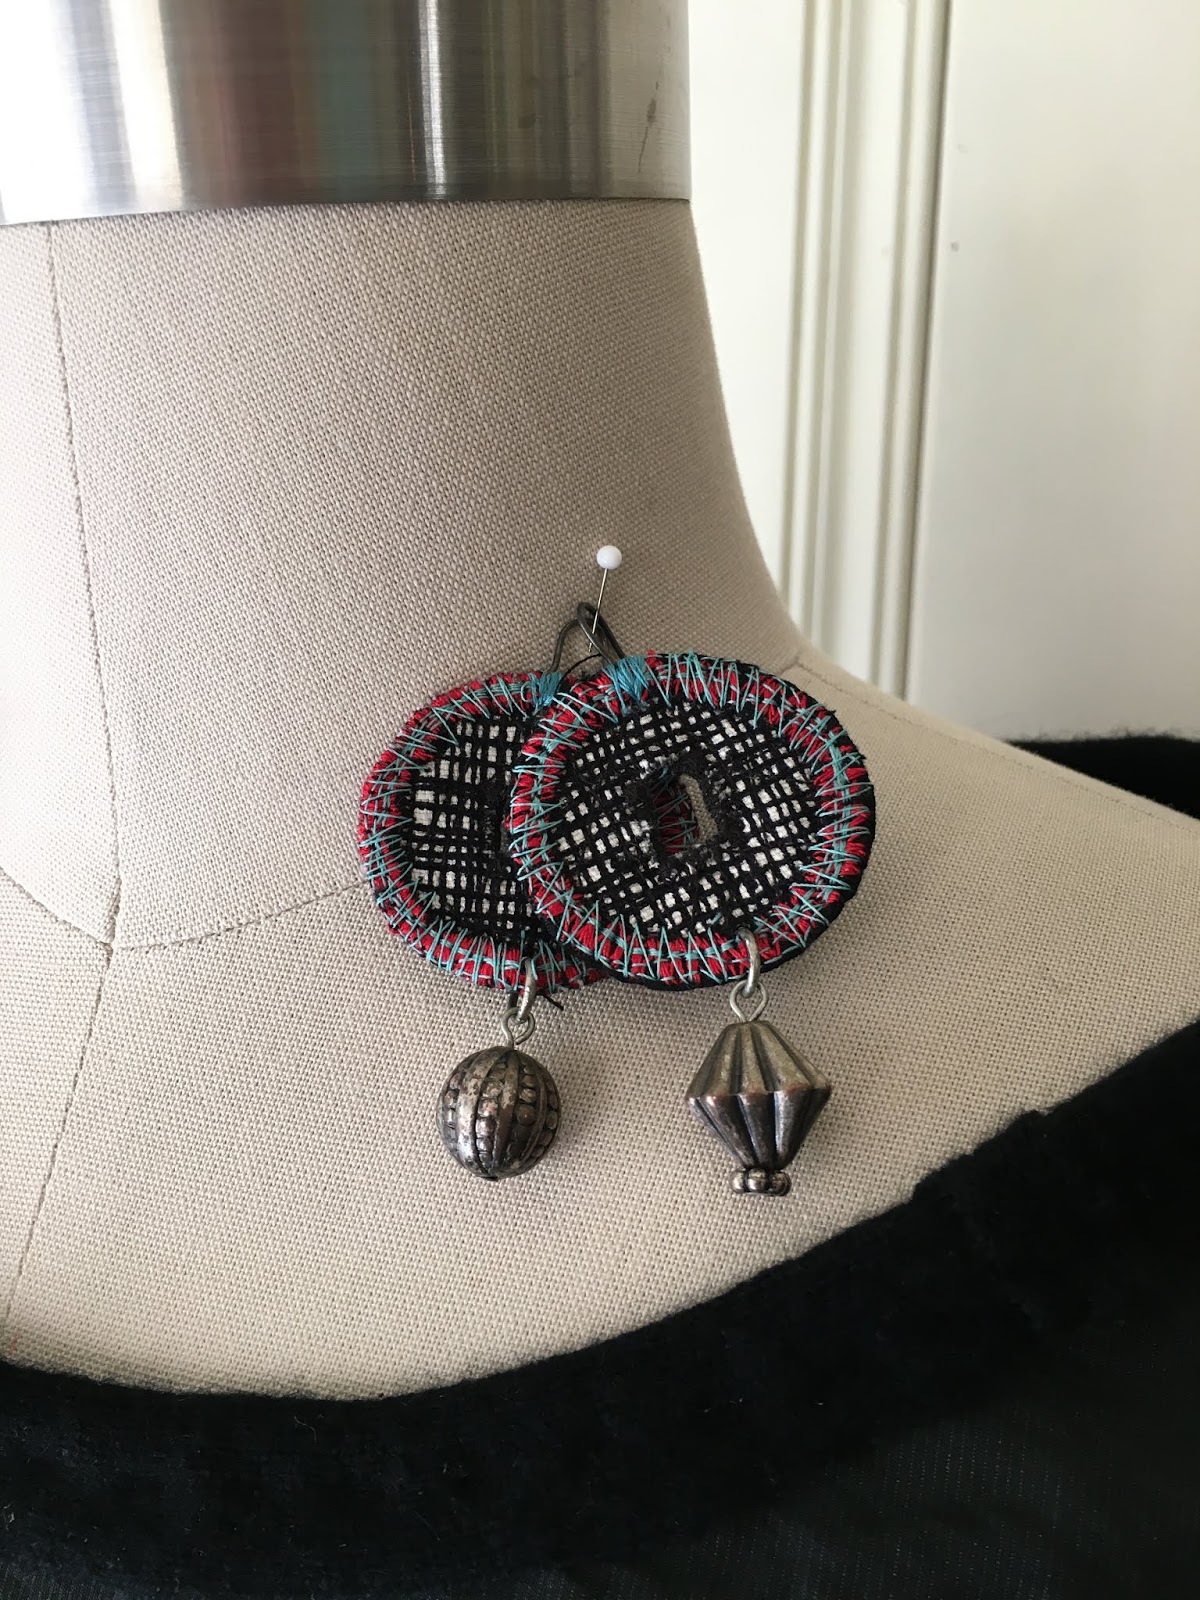
Back in February, so long ago in so many ways, I attended the Design Outside The Lines Carmel retreat with Diane Ericson and Kay Khan.  Kay's work uses fabric scraps that are sewn together with a felt interior making a stiff, shape-able form. 

Her work is usually very large, 3D sculptures but she also makes jewelry using her technique.  This is the third class I've taken.  Previously I made collar-type necklaces, that you can see them in my  "Misc" category on this blog.

This time I wanted to concentrate on earrings, which I wear much more frequently.


I like the way this project is going.  The earrings are light and have just the right amount of swing and movement.  I'm using beads and elements from thrift store jewelry for embellishment.  I just signed up for a Blueprint class on wirework.  I need it!


Please excuse the over exposure and generally horrible photos for this piece...no excuse other than I really don't know what I'm doing!  This is a vest that was drafted from ready-to-wear.  The fabric is a black techno-taffeta with metal threads to give it memory.  I bought yards of it from a California designer who was retiring.

The threads create these little barbs at the cut edges that tend to poke you no matter how you finish the seams.  So for this version I tried encasing the edges around my neck and armholes with cashmere.  We'll see....


Detail of a little cashmere piecing along the neck edge.


I applied a second pocket with the cashmere to tie in the other elements.  Plus you always need more comfy pockets to sink your fists into!


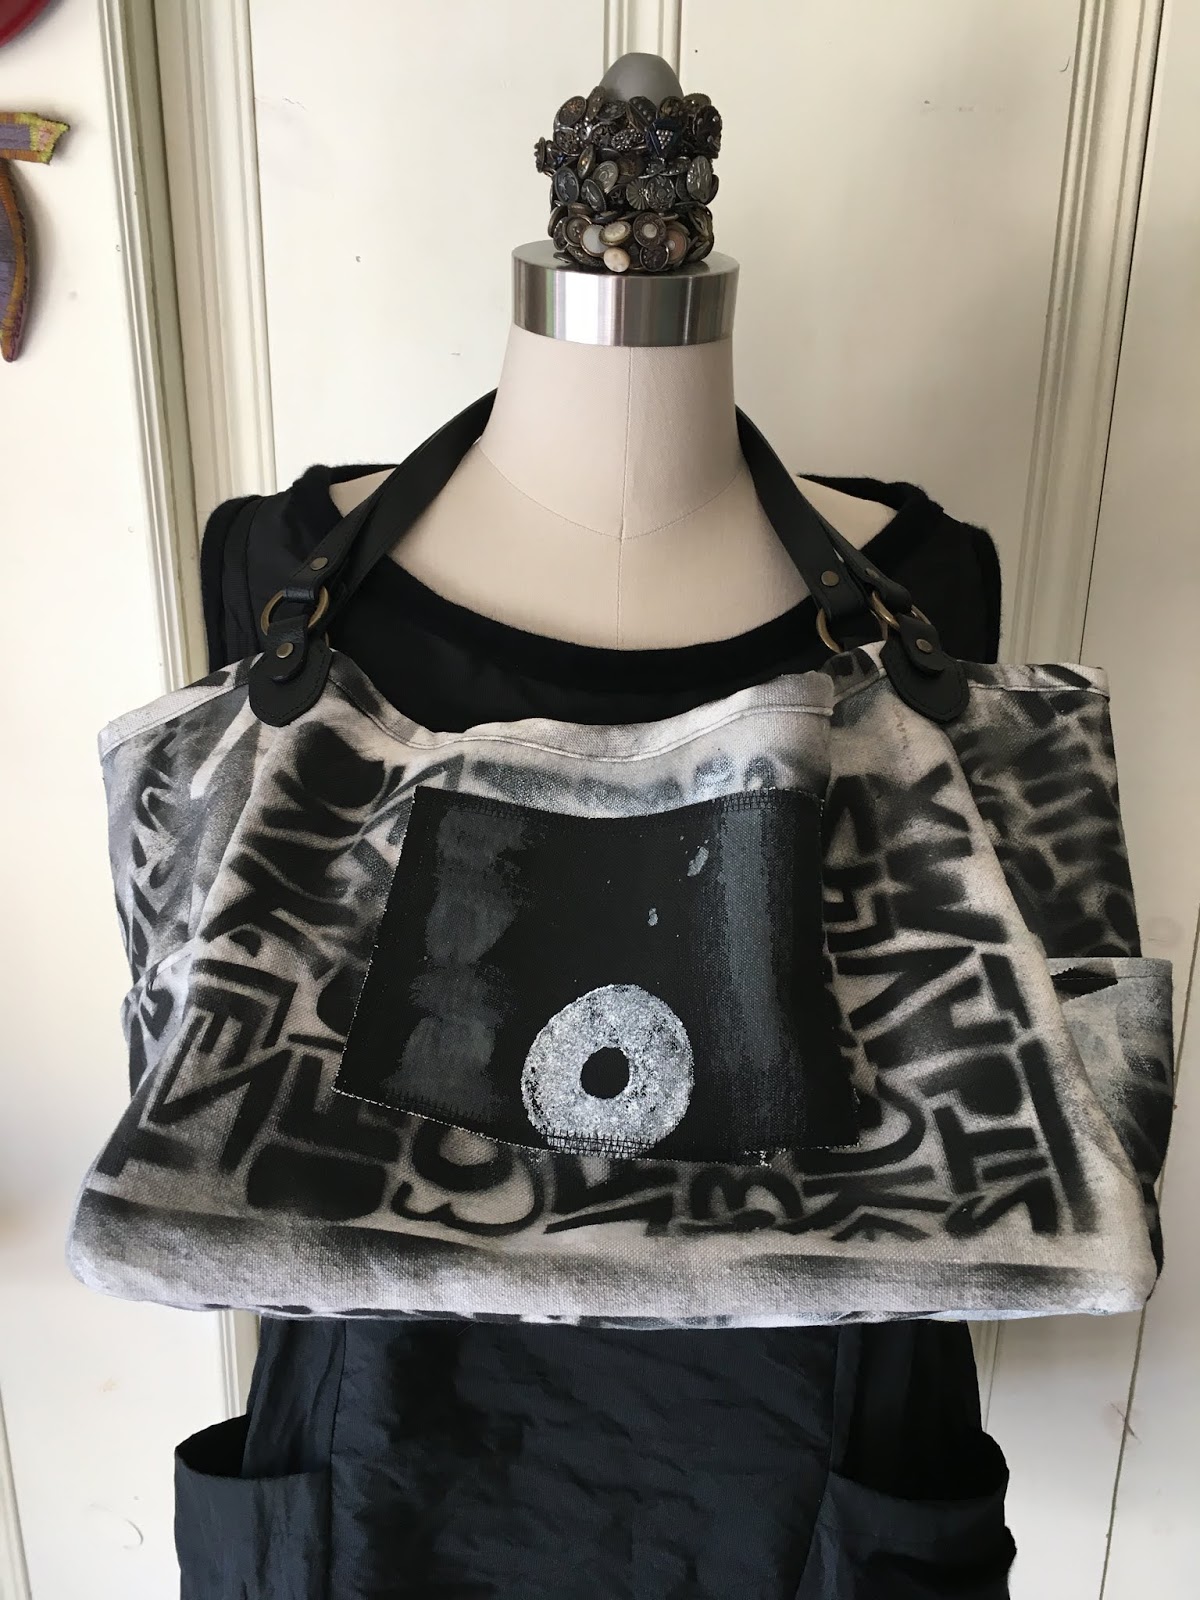
Diane Ericson's son, Miles Frode, makes the most wonderful textiles.  I've purchases and used several over the years.  I designed this purse from a Garnet Hill catalogue I saved years ago.  It has huge exterior pockets on either end.  I like this kind of pocket and have used them in previous totes.  Good place for keys.


The sewn-on center pieces are from canvas I painted many years ago.


And this particularly bad photo shows the inside, my fabric used here.


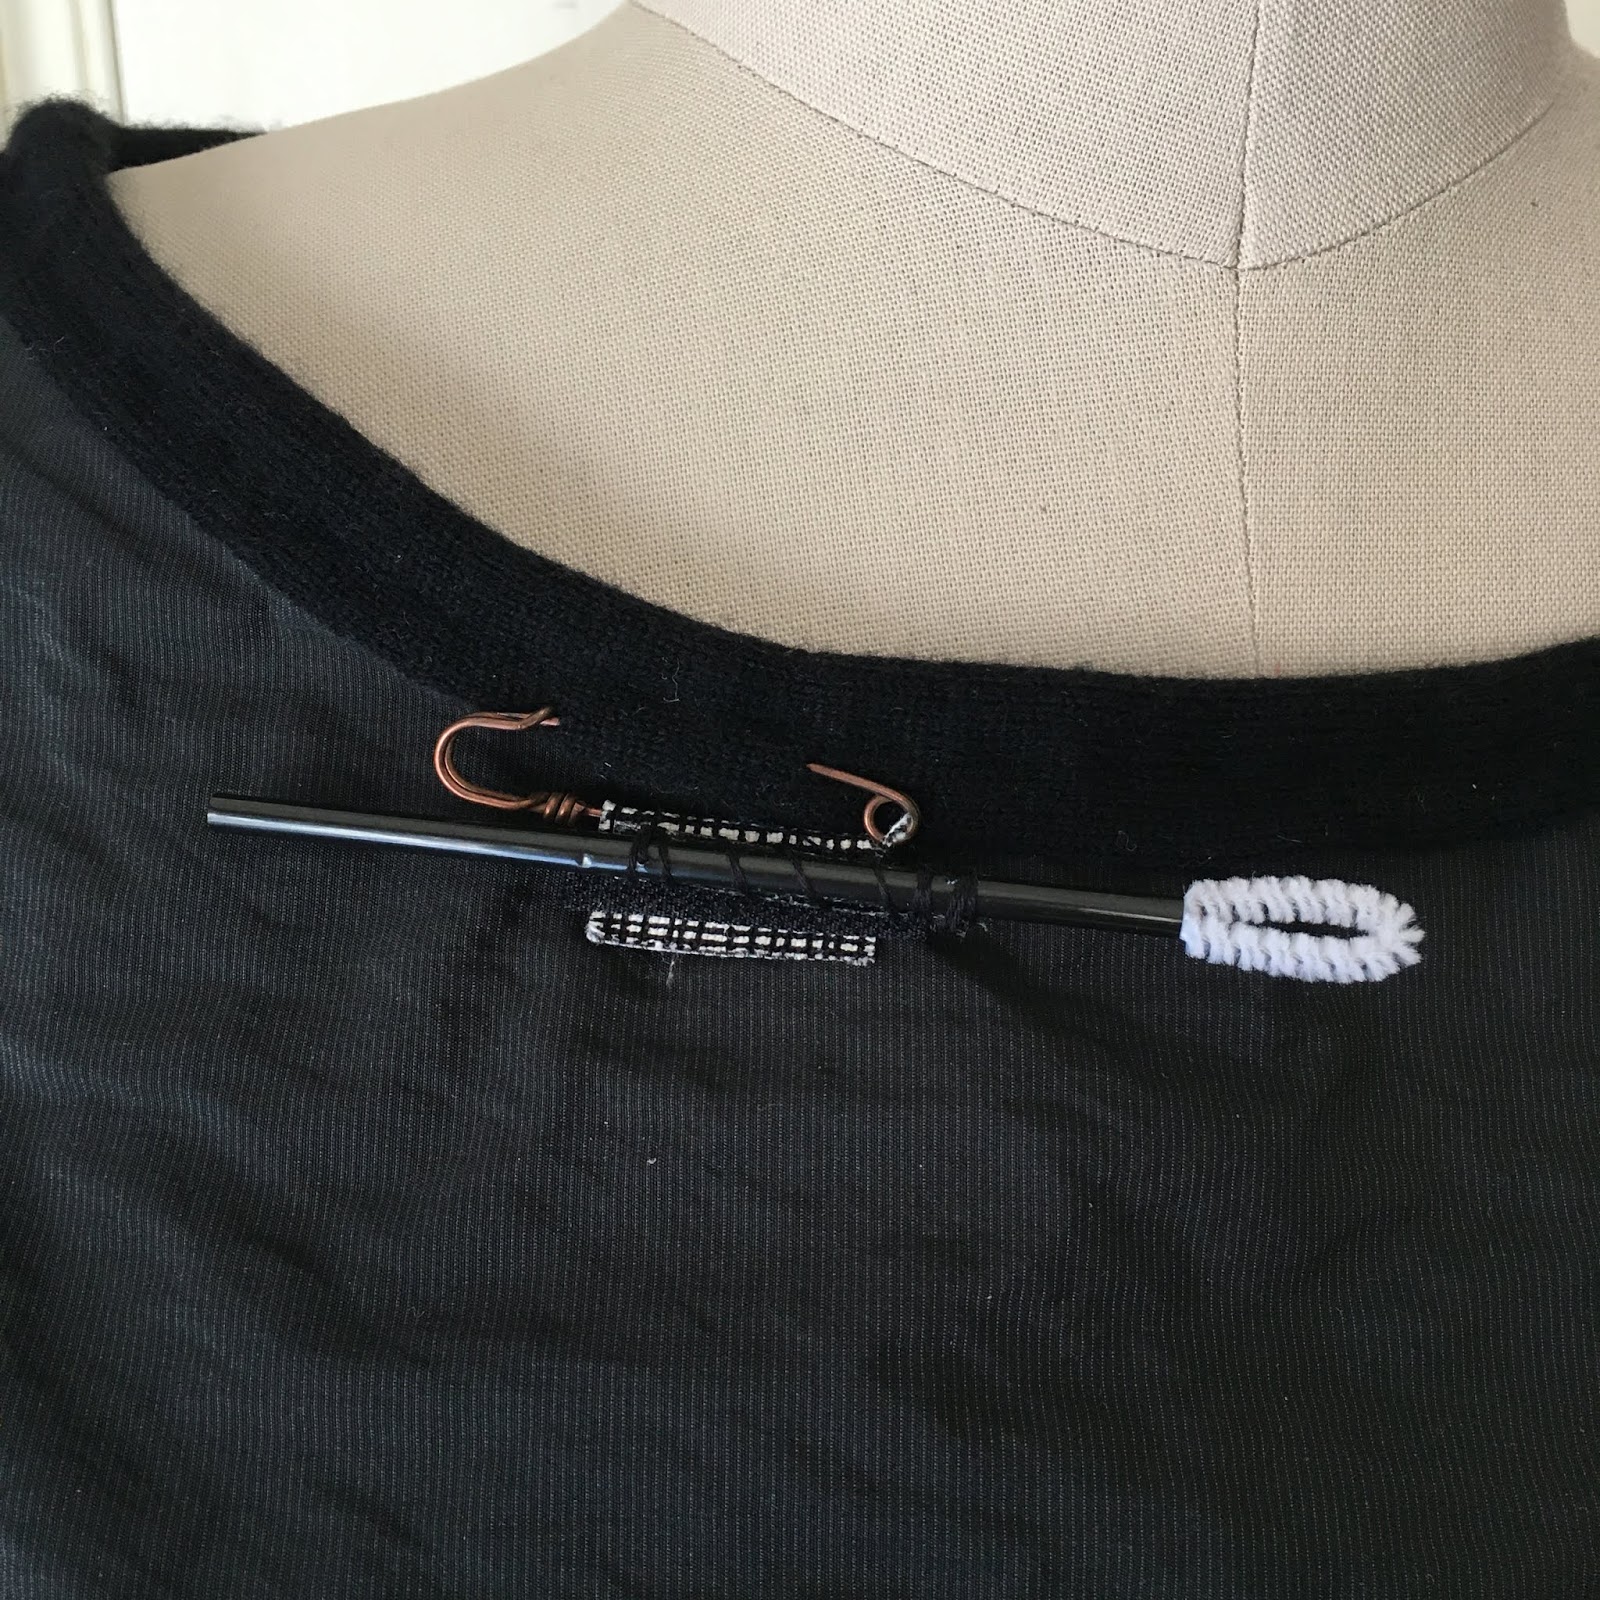
And now, you will see just how whacky I am.  This is my latest invention.  It's a Covid-19 nose scratcher.  My nose is always itchy!  If I were serious about this, which I'm not, it's a joke (!) I would pin it on and use this nifty little brush to scratch my nose.  The velcro attached to the brush makes it easy to take off and put back on!  I know...too much time on my hands!

Stay safe, stay healthy, stay creative...all three save lives.