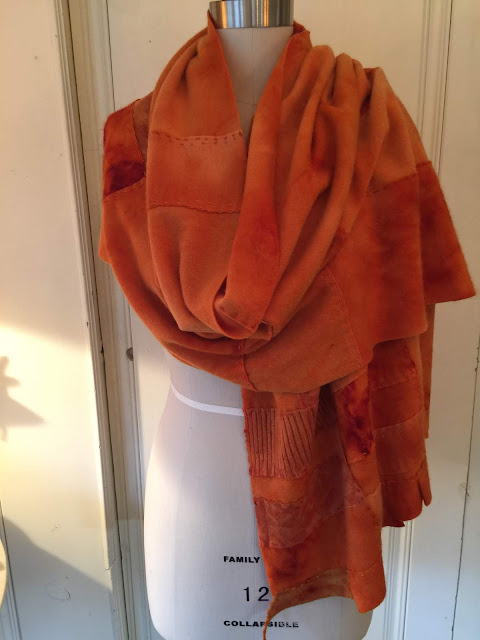
It's cashmere season. I've been digging into my stash and fondling the pieces. My hands landed on a big bundle of overdyed orange I'd been holding onto for years.
They finally called to me. I was leaving for a week's retreat on the Oregon coast and I wasn't bringing a machine. This shawl went together quickly while I was looking out to the tumultuous northern Pacific and listening to all the conversations of the women who surrounded me. Bliss.
I used Perle cotton, mostly single strand, but stitched two rows on each seam for strength. I've made half a dozen of these cashmere shawls. Some machine sewn, the others by hand. But never double hand stitched each seam. I can't believe how much weight it adds to the garment. In a good way.
This fragment was one from the '90's! First I tried stitching pompoms on what is now the underside of the fragment. I must have used a piece of printed paper to stabilize the back, then I eco-overdyed it, washed it and the paper partially disintegrated. It's machine sewn with vintage Japanese silver thread I got at the Santa Cruz Flea Market years ago.
It's funny how, 10 years later, my tastes have changed so much that I love the back of a piece better than the front!
The dye method is one my friend, Janet, taught me. Make a slurry paste of your desired dye. Mordant the fabric, keep it damp. Put it into a kitty litter tray and add the dye slurry. With gloves (!) squish the fabric until you are satisfied with the look and coverage.
Put the fabric into a plastic bag and steam or microwave until the juices run clear...oh wait, that's a poultry cooking method...well you know what I mean. Then, let the fabric cool and wash it on gentle, front loader machine preferably. Lay flat to dry. This is not meant to be a specific formula. It's a loose process kids.
But, it produces a wonderful mottled look that lends itself to piecing.
This sucker is long, about 30" X 7'. Possibly too long...
But I wore it the other day and it felt so good!
And here's all I had left! Oh but wait, I just found more on the guest bed...hmmm, hat?
While I was in Japan last May I was lucky to visit two of the temple markets and found several pieces of vintage fabric. Some of which had some boro hidden inside. This is NOT a boro garment per se. This is a garment made in the boro tradition using vintage fabrics and modern piecing placement.
The pattern is self drafted from a RTW garment owned by a friend, Sarah. I've made it four times.
Here are two examples of the original boro parts of the garment. The patched area on the left is the way I bought the fabric. It is the way they patched holes. I learned how to do this in a class with Jody Alexander and it was a thrill to find this original bit of patching hidden in the fabric, I didn't find it till I washed it at home!
The area to the right is another example of a piece of cloth that I bought like this in Japan. It may be old or not but I'm sure the one on the left is boro.
Again, another hole patch on the left. I hand stitched the patches using a thick thread.
The back is made of vintage fabrics but new construction.
Detail of back, the fabrics were lovely to work with.
The Oregon coast, right?


