
Hold onto your divine blush, your innate rosy magic, or end up brown. Once you're brown, you'll find out you're blue. As blue as indigo. And you know what that means.
Indigo, indigoing, indigone.
Tom Robbins, Jitterbug Perfume, 1984
One of my favorite books.

I've had indigo on my mind the last few months. I took one class here in Santa Cruz last spring and saw a wonderful exhibit at the Seattle Art Museum called Mood Indigo. The vest above is from this show. It's well worth a trip and is showing until early October. I also took an eco-dyeing class at MAIWA in the spring that had an indigo bath.
I'll be taking an eco-printing class in a few weeks that will have an indigo component that I didn't know about. I'm happy about that. I have some previously eco-printed cashmeres that can use a little brightening and indigo might just do the trick. More on that class later in September.
So I've been getting the indigo bug slowly and without really going after it...it's coming after me I think!

I purchases 3 yards of this gorgeous fabric from Marcia Derse at the Puyallup Expo last year. I'm continuing to incorporate color into my wardrobe...one piece at a time.
Marcia was in her booth and what a lovely, fun and talented artist. We had so much fun in her booth. We were there twice and spent a LONG time with her. She designs all of her own fabrics and has them printed. I couldn't decide which one I wanted, I wanted them ALL! And the cotton is such a fine quality. I didn't realize how lovely till I started sewing with it, and then wore it. I want more!
This pattern is from the Bookends line and is called Cat's Cradle in "fig". I wore it yesterday and everyone said, "Gayle, you have to wear this color more often."...ok.
This is a Vogue Lynn Mizono pattern that, thankfully, is still in print. I've made it twice before and have just re-ordered it to cut a bit larger. I love this pattern.

The print worked out well for this pattern. I think I've finally drilled into my brain the benefits of getting enough fabric so that I don't have to sweat whether I'll have enough or not.

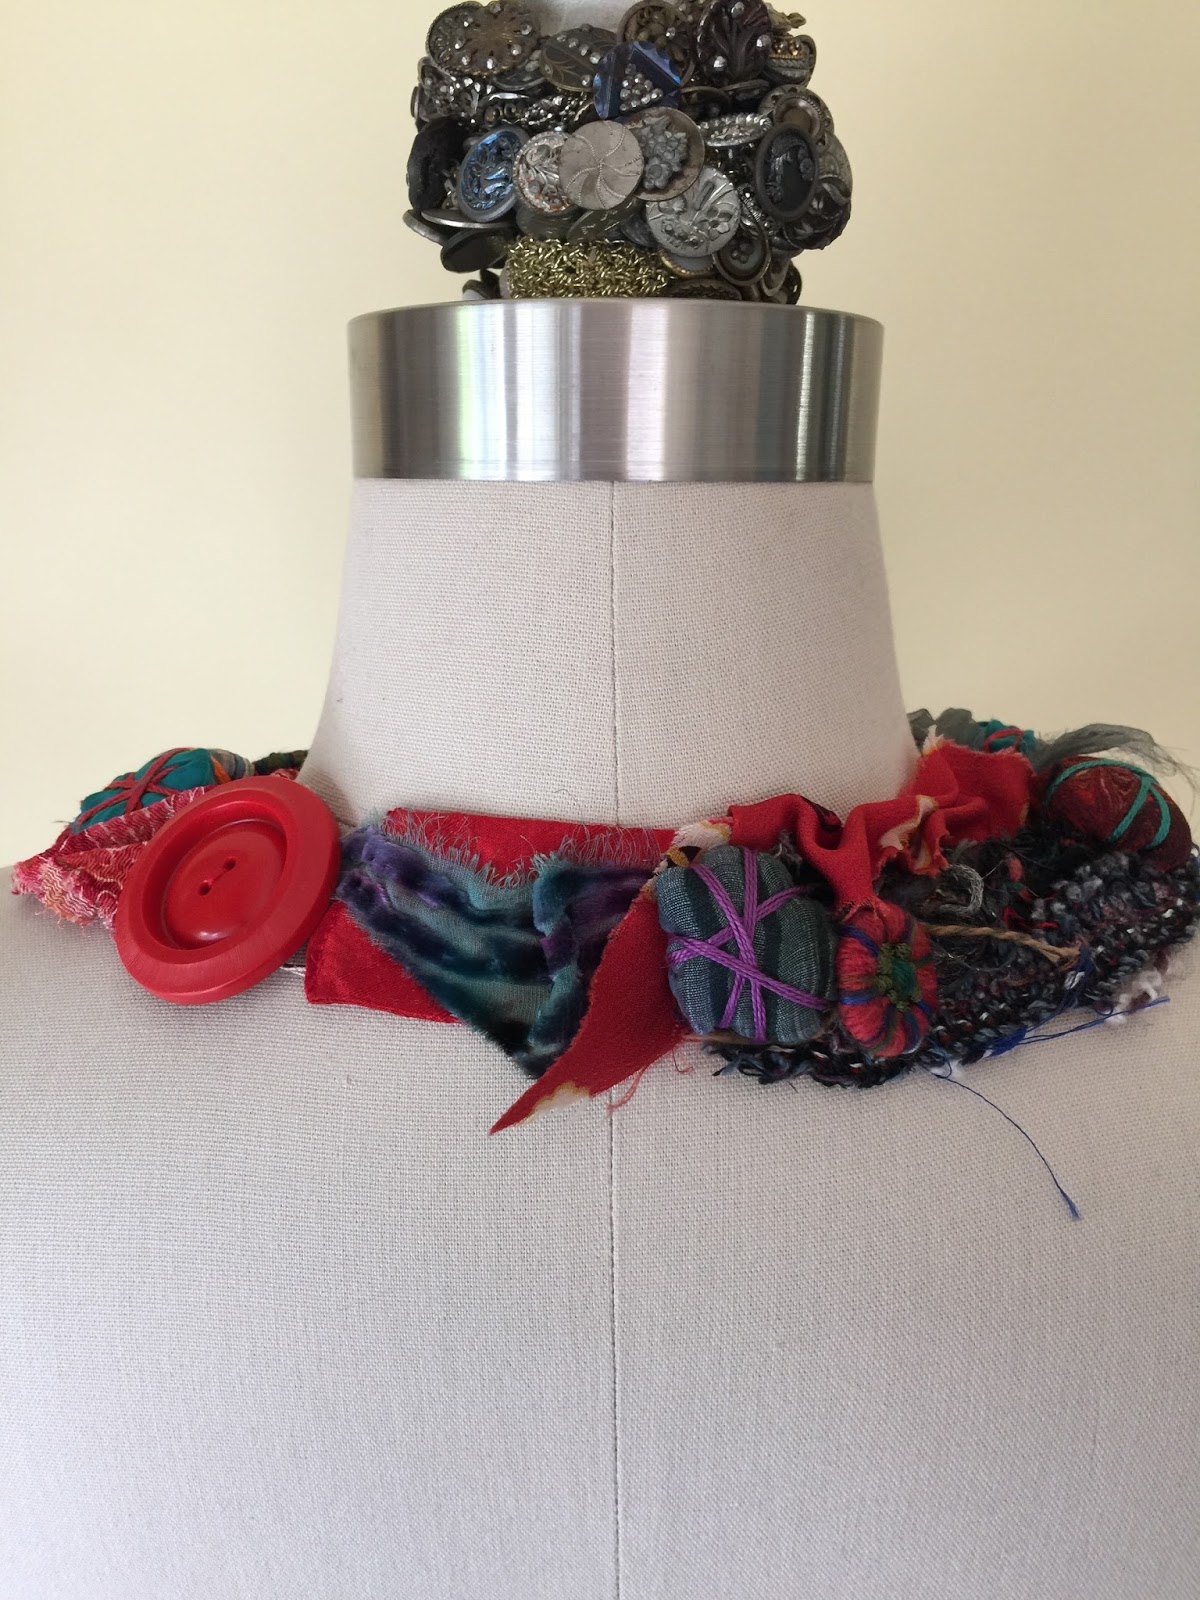
I've been making these collars for several years now. I used to sell them at a wonderful little shop in Carmel, Findings. Do any of you remember it? I mourn it's passing.
I make these by starting with a double thickness raw silk background. Then I drape fabrics around the base and stitch them on. I have so many vintage scarves and bits of fabric I used in the re-made cashmeres I used to sell. Now that I don't do those anymore I'm fishing around for ways to use these beautiful textiles, I'm not ready to give them up.
The little "puffs" are pieces of fabric, kimono fabric, cashmere, anything that works. I stuffed them and then used Pearl cotton for the wraps.
The little pinwheels are Dorset buttons made from curtain rings and various yarns. I've given my pattern at the bottom of this post. I taught it to my knitting guild many years ago. I'm sorry I wasn't able to get my photo to copy here but if you look up Dorset buttons you will see many. I didn't want to copy someone else's photo without their permission.

I was happy to finally finish the piece. It's been in my UFO pile for about two years.

I'll wear this one, I think. They are really comfortable.
The closure is offset, or I can wear it so that the button is center back and the front is offset.
Here's the pattern for the buttons, try them, they are so fun and easy to make.
DORSET CROSSWHEEL BUTTON
These buttons are fun
and easy to make. They are particularly cute for children’s
garments. They can be
made any size depending on the size ring used.
Materials needed:
Plastic or brass
curtain rings to fit buttonhole
Darning needle
Strands of yarn in 3
colors (A, B and C)
Instructions
1) Tie
a strand of A on the ring. Thread the
needle with the strand.
2) With
the yarn positioned away from you on the ring, bring the needle up through the
hole and then down and away from you between the loop of yarn on the
outside of the ring. Pull tight to form
a buttonhole stitch.
3) Continue
around the ring, pushing the stitches tightly together as you go. When all the way around the ring secure the
first and last stitch. If this is the color of the body of the sweater, leave
the tail long to sew button on.
4) Push
the stitches to the inside of the ring
5) Join
a strand of yarn B to the ring and make 8 spokes that have a front and back,
evenly around ring, interlocking each spoke in the center.
6) Make
cross stitches in the center of the button that holds all the stitches together
and makes a nice center. Weave in loose
ends.
7) Join
a strand of C at the back center and bring it through to the front. Backstitch in a clockwise fashion, back over
one spoke, then pass the needle under the next spoke, backstitch over that and
so on to produce a spider’s web pattern.
Repeat as many times as necessary to produce a full center of the
button. Weave in loose ends but leave a shank to attach the button to your garment or project.
And finally, a couple of photos from a fun visit I made with my pal, Julie, to the Gilroy Gardens to see their Illuminations show that is there till November, I think.


Enjoy the end of summer!